The Result
A single ATSPACE airtightness toolbox talk, delivered directly to the trades doing the work, cut air leakage snags by half on a live residential site. The improvement came from making airtightness practical, visual and repeatable, with clear ownership of the junctions that normally cause failures.
Project Snapshot
Service: Air leakage on‑site design advice
Client: Main contractor delivering mixed‑tenure housing
Site: Riverside View, Barton Lane, Nottingham NG2
Scale: 64 plots across two phases
Build type: Masonry cavity walls with mixed roof forms
Programme stage: Phase one entering second fix
Compliance driver: Approved Document Part L
ATSPACE delivery: Airtightness toolbox talk, detail guidance, follow‑up spot checks
Why the Client Requested a Toolbox Talk
The site was not failing every test — the problem was inconsistency and repeat snags.
Two expensive patterns had emerged:
- Airtightness snags were found late, often after finishes restricted access
- The same snag types were appearing plot after plot
A toolbox talk made commercial sense because it stopped repeat defects before they became part of the build.
The client wanted:
- Fewer snags per plot
- Higher first‑time pass rates
- Less rework behind kitchens and bathrooms
- Clearer trade ownership of airtightness interfaces
The Real Causes of Repeated Airtightness Snags
Most housing sites struggle for four reasons:
- Airtightness is treated as a test event, not a build discipline
- Trades only see their detail, not the airtightness line across interfaces
- Small layout or service changes creep in plot to plot
- Everyone assumes someone else will “seal it later”
A toolbox talk works when it changes behaviour — not just knowledge.
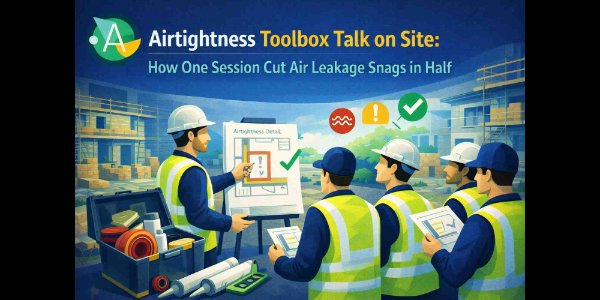
What ATSPACE Delivered
1. Trade‑focused toolbox talk based on real site details
Delivered on site, using real junctions from that exact house type.
Covered:
- What airtightness actually is in practice
- Why Part L airtightness matters to programme and cost
- The most common leakage routes on this site
- What “good” looks like at key junctions
- Who owns each interface
- Simple readiness checks before test booking
2. Site‑specific snag patterns and fixes
We focused on the snags the site was repeatedly seeing.
Typical issues addressed:
- Gaps behind meter cupboards and incoming services
- Leaks behind kitchens and utility zones
- Poor sealing at soil stack penetrations
- Boxing hiding gaps instead of sealing them
- Loft hatch seals with poor compression
- Drylining edges not forming a continuous airtight layer
We then demonstrated the practical fixes.
3. Simple rules that stopped repeat defects
The biggest improvements came from process clarity, not materials.
Rules introduced on site:
- No boxing closed until the seal behind is complete
- Any new penetration requires immediate reseal + sign‑off
- Meter cupboard close‑out checked before second fix completion
- Loft hatch seal compression physically checked before test booking
- Wet room penetrations sealed before sanitaryware limits access
Short. Memorable. Enforceable.
4. Follow‑up spot checks to maintain consistency
Toolbox talks fail when treated as one‑off events.
We returned for spot checks, reinforcing the standards on real plots as different crews moved through the work.
The Problems Faced and What Changed
Problem 1: Airtightness not owned across interfaces
Fix: Assign responsibility per junction, not per trade.
Problem 2: Snags identified too late
Fix: Move airtightness checks earlier into readiness routines.
Problem 3: Repeat snags plot to plot
Fix: Standardisation — once a pattern appears, check the next plots proactively.
Results
In the next testing cycle, the site recorded a clear improvement.
Measured improvements (verified by spot checks):
- ~50% fewer air leakage snags per plot
- Faster readiness sign‑off for air testing
- Fewer late access issues behind finished areas
- Better consistency across crews and house types
The site stopped repeating the same mistakes.
What This Proves
Airtightness improves fastest when trades understand:
- What airtightness looks like at the junction they’re building
- Why it matters to programme and cost
A toolbox talk works when it is:
- practical
- site‑specific
- reinforced with follow‑up
Common Mistakes the Site Avoided After the Talk
- Treating airtightness as “the tester’s problem”
- Allowing penetrations without controlled close‑out
- Assuming visible sealant equals airtightness
- Leaving meter cupboards until the end
- Booking air tests before plots were genuinely ready
CTA
If your site is seeing repeated air leakage snags, inconsistent results or too many retests, an ATSPACE airtightness toolbox talk can quickly tighten performance.
Ask for:
- Site‑based airtightness toolbox talks
- Trade‑focused detail guidance using your house types
- Follow‑up spot checks to maintain standards
- Support to reduce snags and improve first‑time pass rates
Frequently Asked Questions
What is an airtightness toolbox talk?
A short, site‑based session showing trades what airtightness looks like on their build and how to avoid the snags that cause failures.
Who should attend?
Anyone creating or closing penetrations: drylining, M&E, carpentry, plumbing, site supervisors.
How can one session reduce snags so quickly?
Because most snags repeat — once trades understand the handful of weak points, the cycle stops.
What are the most common airtightness snags?
Service penetrations behind kitchens/bathrooms, meter cupboards, loft hatches, soil stack penetrations, unsealed boxing edges.
Do you provide follow‑up checks?
Yes — follow‑up spot checks keep standards consistent as crews and plot types change.