The Headline Result
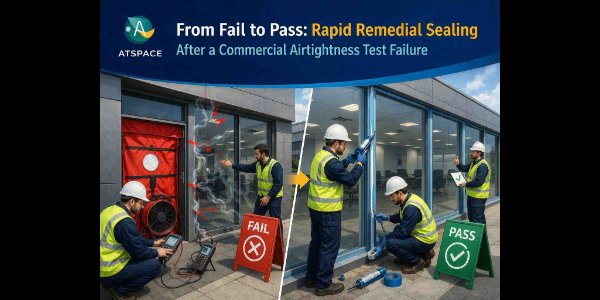
When a commercial building failed its airtightness test, ATSPACE delivered a rapid recovery plan: leak detection, prioritised remedial sealing, and a controlled retest. The project moved from fail to pass without drifting the programme, because we focused on the leakage routes that actually move the result—not generic snagging.
Project Snapshot
Service: Commercial Air Leakage Testing + Airtightness Troubleshooting (non‑domestic)
Client: Principal contractor – anonymised
Building type: Commercial unit with mixed office/production space
Location: Central Point Trade Park, Leeds Outer Ring, Yorkshire (address anonymised)
Scale: Approx. 9,500 m²
Programme stage: Late-stage / pre-handover
Problem: Failed initial pressure test
ATSPACE team: Accredited Airtightness Test Engineer + Remedial coordination
Why This Matters (The Cost of a Commercial Fail)
A commercial airtightness failure is rarely just a number. It typically causes:
- remedial works in finished areas
- coordination challenges between trades
- access equipment + out‑of‑hours planning
- retest pressure and booking constraints
- client confidence issues
Most importantly, it creates programme risk.
The contractor didn’t just want improvement—they needed a fast, low‑disruption pass.
What Caused the Failure (Typical Commercial Reality)
When brought in after the failure, ATSPACE saw familiar patterns:
- “Visually finished” interfaces that weren’t airtight
- Access panels and doors with weak seals
- Service penetrations that were fire‑stopped but not airtight
- Roof penetrations not fully closed out
- Long junction lines with small but cumulative gaps
- Late-stage works reopening previously sealed areas
A structured recovery plan was essential.
ATSPACE Recovery Brief
The contractor needed ATSPACE to:
- identify the dominant leakage pathways
- propose practical remedials suitable for a live, nearly‑finished site
- coordinate a retest window aligned with programme
- deliver a pass with clean, defensible evidence
ATSPACE “Fail to Pass” Method (What We Did)
Step 1: Confirm test context and failure characteristics
Before any sealing, we confirmed:
- test configuration and test conditions
- which zones were likely driving leakage
- where the airtightness line should be continuous
- where breaks usually occur in buildings of this type
This avoided random sealing and time waste.
Step 2: Rapid leak finding and prioritisation
We used practical leak‑finding methods focused on:
- door sets and access panels
- risers and service cupboards
- roof/plant penetrations
- façade junctions and slab edges
- long junction lines
Principle: Not all leaks matter equally—dominant paths drive most failures.
Step 3: Remedial sealing plan (clear actions + ownership)
We delivered a prioritised list that:
- named exact locations
- defined what “good” looked like
- assigned likely trade responsibility
- avoided temporary fixes that would fail later
Step 4: Retest readiness control
Before retesting, we confirmed:
- remedials were complete
- no new penetrations had been created
- access panels/doors were sealing correctly
- roof penetrations were closed out
- internal configuration matched the test method
Step 5: Controlled retest and reporting
ATSPACE controlled:
- door positions and openings
- internal pressure equalisation
- test conditions documentation
- immediate result feedback
The Real Remedial Wins (What Actually Moved the Needle)
Win A: Access panels and service doors
Poor seals and closure pressure.
Action: Upgrade sealing and ensure consistent compression.
Impact: High — these interfaces leak heavily under pressure.
Win B: Roof penetrations and plant interfaces
Final sealing was incomplete.
Action: Continuous close‑out around flashings and penetrations.
Impact: High — roof leakage dominates commercial results.
Win C: Long junction lines at slab/edge interfaces
Small gaps adding up.
Action: Targeted sealing along identified discontinuities.
Impact: High — length matters in commercial airtightness.
Win D: Stop the late‑change issue
A simple rule was agreed:
- penetrations frozen after remedials sign‑off
- any essential new penetration resealed immediately
This protected the retest from new failures.
Results
- Initial test: Fail
- ATSPACE intervention: leak finding + remedials + readiness control
- Retest outcome: Pass
- Programme impact: contained
- Deliverable: compliance‑ready documentation
What This Project Proves
A failed airtightness test doesn’t need to become weeks of disruption. The fastest recoveries happen when you:
- identify the dominant leakage paths
- fix what actually moves the result
- control readiness before retesting
- avoid random sealing and blame loops
ATSPACE’s job is to turn a failure into a controlled, winnable plan.
Common Mistakes After a Commercial Airtightness Fail
- sealing everything blindly
- ignoring access panels and doors
- only fixing “obvious” holes
- allowing late trades to reopen sealed areas
- booking a retest without a readiness check
CTA
If you’ve failed a commercial airtightness test and need to recover fast, ATSPACE can help with:
- rapid leak-finding
- prioritised remedial planning
- readiness checks
- controlled retesting + clear reporting
Send your building type, size, programme constraints and failure outcome — we’ll advise the quickest route to a pass.
FAQ
Can you fix a failed commercial airtightness test quickly?
Often yes—if you target dominant leakage routes and control readiness before the retest.
Why do commercial buildings fail airtightness tests?
Usually interface gaps: risers, ceilings, penetrations, door/panel seals and long junction lines that aren’t airtight even when visually tidy.