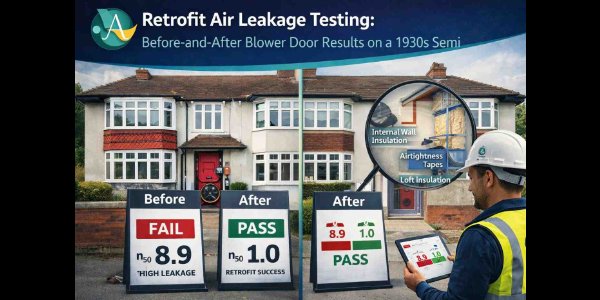
The Result
A 1930s semi‑detached home underwent an energy retrofit, but the client wanted proof that the building fabric actually improved — not just upgraded paperwork. ATSPACE carried out before‑and‑after blower‑door testing, identified the dominant leakage routes, guided practical sealing, and re‑tested to confirm real improvement.
Measured results:
- Before retrofit: 11.6 m³/h·m² at 50 Pa
- After retrofit: 5.9 m³/h·m² at 50 Pa
A clear step‑change in uncontrolled leakage — achieved without invasive rework and with ventilation checks included to ensure improved comfort without moisture risk.
Project Snapshot
Service: Retrofit air leakage testing
Client: Private homeowner + retrofit contractor
Site: 27 Hawthorn Crescent, Kings Heath, Birmingham B14 6QW
Property type: 1930s semi‑detached, two‑storey
Construction: Solid/cavity mix, suspended timber ground floor, pitched roof
Retrofit works: Loft/underfloor insulation, window/door upgrades, targeted airtightness improvements
Programme stage: Baseline test → Post‑works verification test
ATSPACE delivery: Baseline test, leak tracing, close‑out plan, verification test, retrofit evidence reporting
Why Retrofit Air Leakage Testing Mattered
Retrofit succeeds only if air leakage is controlled. This home had three classic 1930s‑era issues:
1. Suspended timber floors + open void pathways
Sub‑floor air moved through voids, service routes, stair zones — undermining comfort.
2. Chimney and fireplace routes
Redundant flues acted like extraction paths, often dominating leakage.
3. Lots of small gaps everywhere
Skirtings, floorboards, loft hatches, vents, boxing, and decades of service penetrations.
The homeowner’s goal: make the home warmer, reduce drafts, prove measurable improvement.
What a Blower Door Test Proves in Retrofit
A blower‑door test measures uncontrolled air leakage — but the real value is:
- establishing a baseline
- finding high‑impact leak routes
- prioritising fixes
- verifying improvements
- avoiding wasted retrofit spend
It also ensures that increasing airtightness doesn’t compromise ventilation or moisture control.
The Homeowner’s Problem Before Work Started
The homeowner described:
- cold ground‑floor rooms
- drafts around hallway/stairs
- difficulty maintaining warmth
- cold spots near bay window/front door
Insulation alone would not fix these issues. They needed airtightness insight — and proof.
What ATSPACE Did
Step 1: Baseline blower‑door test
Baseline result: 11.6 m³/h·m² at 50 Pa
Step 2: Diagnostic leak tracing
We traced airflow under pressure to identify dominant leakage routes (not every tiny gap):
-
Suspended floor perimeter + service penetrations
Air rising from sub‑floor voids into hallway + living room. -
Chimney route + redundant fireplace openings
Strong stack‑effect leakage. -
Loft hatch + ceiling penetrations
Weak compression and sealing. -
Bay window junctions
Small discontinuities from historic repairs. -
Front door threshold + frame line
Common weak point on older properties.
Step 3: A practical close‑out plan for a 1930s house
Actions included:
- sealing suspended floor perimeter points where accessible
- safe closure of redundant flue routes
- improving loft hatch sealing/compression
- sealing penetrations linking floor voids to living spaces
- improving front‑door seal continuity
- confirming bay‑window reveal continuity
The plan avoided intrusive work and focused on continuity, not cosmetic sealant.
Step 4: Post‑works verification blower‑door test
Post‑works result: 5.9 m³/h·m² at 50 Pa
Why the Improvement Mattered
The homeowner gained:
- reduced cold air infiltration
- more stable temperatures
- improved comfort without extra heating
- fewer hallway/living‑room drafts
- clear evidence the retrofit worked
The contractor gained a repeatable method for similar homes.
Practical Lessons from This 1930s Semi
Lesson 1: The biggest leaks aren’t where people think
Sub‑floor voids + chimneys were more important than visible gaps.
Lesson 2: Suspended floor airtightness is a major opportunity
Insulation alone doesn’t solve comfort unless air pathways are controlled.
Lesson 3: Loft hatches often leak far more than expected
Simple improvements deliver big gains.
Lesson 4: Verification changes everything
Without post‑testing, improvement is guesswork. With testing, it’s proven.
Common Mistakes This Project Avoided
- relying on insulation without leakage control
- sealing only visible gaps
- ignoring chimney pathways
- upgrading windows/doors without junction continuity checks
- improving airtightness without reviewing ventilation
CTA
If you are retrofitting an older home and want proof your upgrade worked, ATSPACE retrofit air leakage testing delivers a baseline, identifies real leaks, and verifies improvement.
Ask for:
- baseline + post‑retrofit blower‑door testing
- diagnostic leak tracing
- practical close‑out guidance for older homes
- reporting for evidence packs + contractor sign‑off
Frequently Asked Questions
Do you need a blower‑door test on a retrofit?
Not mandatory — but it’s the most reliable way to prove improvement.
What’s a good air permeability result for an older home?
It varies — the key is measurable improvement and ensuring ventilation suitability.
Can you test before and after works?
Yes — this is the standard retrofit approach.
Will airtightness improvement cause condensation?
Only if ventilation isn’t considered. Both must be planned together.
What are the most common leaks in 1930s houses?
Suspended floor voids, chimney routes, loft hatches, service entries, and thresholds.